mirror of
https://github.com/meshtastic/meshtastic.git
synced 2024-11-14 17:44:37 -08:00
64 lines
3.9 KiB
Markdown
64 lines
3.9 KiB
Markdown
---
|
|
id: build-instructions
|
|
title: Build Instructions
|
|
sidebar_label: Building
|
|
---
|
|
|
|
This project uses the simple PlatformIO build system. PlatformIO is an extension to Microsoft VSCode. Workflows from building from the GUI or from the command line are listed below.
|
|
|
|
If you encounter any problems, please post a question in [our forum](https://meshtastic.discourse.group). And when you learn a fix, update these instructions for the next person (i.e. edit this file and send in a [pull-request](https://opensource.com/article/19/7/create-pull-request-github) which we will eagerly merge).
|
|
|
|
## GUI
|
|
|
|
1. Purchase a suitable [radio](/docs/hardware).
|
|
2. Install [Python](https://www.python.org/downloads/).
|
|
3. Install [Git](https://git-scm.com/downloads).
|
|
4. Reboot your computer.
|
|
5. Install [PlatformIO](https://platformio.org/platformio-ide).
|
|
6. Click the PlatformIO icon on the side bar. 
|
|
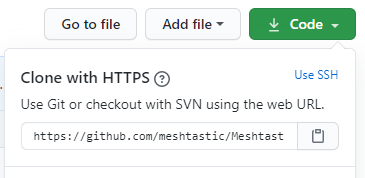
7. Under `Quick Access, Miscellaneous, Clone Git Project` enter the URL of the Meshtastic repo found [here](https://github.com/meshtastic/Meshtastic-device). 
|
|
8. Select a file location to save the repo.
|
|
9. Once loaded, open the `platformio.ini` file.
|
|
10. At the line `default_envs` you can change it to the board type you are building for ie. `tlora-v2, tlora-v1, tlora-v2-1-1.6, tbeam, heltec, tbeam0.7` (boards are listed further down in the file).
|
|
11. The hardware can be configured for different countries by adding a definition to the `configuration.h` file. `#define HW_VERSION_US` or `HW_VERSION_EU433, HW_VERSION_EU865, HW_VERSION_CN, HW_VERSION_JP`. Other country settings can be found in `MeshRadio.h`. The default is `HW_VERSION_US`.
|
|
12. Click the PlatformIO icon on the side bar. Under `Project Tasks` you can now build or upload.
|
|
|
|
Note - To get a clean build you may have to delete the auto-generated file `./.vscode/c_cpp_properties.json`, close and re-open Visual Studio and WAIT until the file is auto-generated before compiling again.
|
|
|
|
## Command Line
|
|
|
|
1. Purchase a suitable [radio](/docs/hardware).
|
|
2. Install [PlatformIO](https://platformio.org/platformio-ide)
|
|
3. Download this git repo and cd into it:
|
|
|
|
```bash
|
|
git clone https://github.com/meshtastic/Meshtastic-device.git
|
|
cd Meshtastic-device
|
|
```
|
|
|
|
4. Run `git submodule update --init --recursive` to pull in dependencies this project needs.
|
|
5. If you are outside the USA, run `export COUNTRY=EU865` (or whatever) to set the correct frequency range for your country. Options are provided for `EU433`, `EU865`, `CN`, `JP` and `US` (default). Pull-requests eagerly accepted for other countries.
|
|
6. Plug the radio into your USB port.
|
|
7. Type `pio run --environment XXX -t upload` (This command will fetch dependencies, build the project and install it on the board via USB). For XXX, use the board type you have (either `tlora-v2, tlora-v1, tlora-v2-1-1.6, tbeam, heltec, tbeam0.7`).
|
|
8. PlatformIO also installs a very nice VisualStudio Code based IDE, see their [tutorial](https://docs.platformio.org/en/latest/tutorials/espressif32/arduino_debugging_unit_testing.html) if you'd like to use it.
|
|
|
|
## Decoding stack traces
|
|
|
|
### Option 1
|
|
|
|
If you get a crash, you can decode the addresses from the `Backtrace:` line:
|
|
|
|
1. Save the `Backtrace: 0x....` line to a file, e.g., `backtrace.txt`.
|
|
2. Run `bin/exception_decoder.py backtrace.txt` (this uses symbols from the
|
|
last `firmware.elf`, so you must be running the same binary that's still in
|
|
your `.pio/build` directory).
|
|
|
|
### Option 2
|
|
|
|
You can run the exception decoder to monitor the serial output and decode backtraces in real time.
|
|
|
|
1. From within PlatformIO, open a new terminal.
|
|
2. At the terminal, enter:
|
|
`pio device monitor --port /dev/cu.SLAB_USBtoUART -f esp32_exception_decoder`
|
|
Replace the value of port with the location of your serial port.
|