mirror of
https://github.com/meshtastic/meshtastic.git
synced 2024-11-10 07:34:11 -08:00
Thanks to aspell and languagetool. Hand picked from these, there are too
many strange things in the English language to be perfectly syntactical.
3.1 KiB
3.1 KiB
| id | title | sidebar_label |
|---|---|---|
| build-env | Creating a build/development environment | Building Meshtastic |
This project uses the simple PlatformIO build system. PlatformIO is an extension to Microsoft VSCode.
GUI Installation
- Install Python.
- Install Git or GitHub Desktop
- Install Microsoft Visual Studio Code
- Install PlatformIO.
- Click the PlatformIO icon on the side bar.

- Under
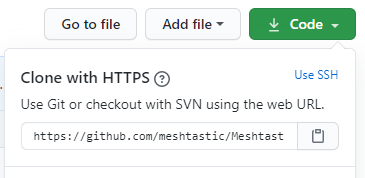
Quick Access, Miscellaneous, Clone Git Projectenter the URL of the Meshtastic repo found here.
- Select a file location to save the repo.
- Once loaded, open the
platformio.inifile. - At the line
default_envsyou can change it to the board type you are building for ie.tlora-v2, tlora-v1, tlora-v2-1-1.6, tbeam, heltec, tbeam0.7(boards are listed further down in the file). - The hardware can be configured for different countries by adding a definition to the
configuration.hfile.#define HW_VERSION_USorHW_VERSION_EU433, HW_VERSION_EU865, HW_VERSION_CN, HW_VERSION_JP. Other country settings can be found inMeshRadio.h. The default isHW_VERSION_US. - Click the PlatformIO icon on the side bar. Under
Project Tasksyou can now build or upload.
:::note
To get a clean build you may have to delete the auto-generated file ./.vscode/c_cpp_properties.json, close and re-open Visual Studio and WAIT until the file is auto-generated before compiling again.
:::
Manual Installation on Linux
- On a Linux distro (like Ubuntu), ensure you have pre-requisites installed:
sudo apt-get update
sudo apt-get install python3 g++ zip
- Install PlatformIO (which is usually via wget/curl command).
wget https://raw.githubusercontent.com/platformio/platformio-core-installer/master/get-platformio.py -O get-platformio.py
chmod +x get-platformio.py
python3 get-platformio.py
-
Clone the repo https://github.com/meshtastic/Meshtastic-device
-
Change into the Meshtastic-device and then download submodules
cd Meshtastic-device
git submodule update --init --recursive
Note: If you get an error like this:
Compiling .pio/build/rak4631_5005/src/plugins/PositionPlugin.cpp.o
src/nrf52/NRF52CryptoEngine.cpp:3:10: fatal error: ocrypto_aes_ctr.h: No such file or directory
then you need to run that submodule command from the main Meshtastic-device directory.
- Activate the Platformio python virtual environment
source ~/.platformio/penv/bin/activate
- Build everything (optionally just build what you really need by editing platformio.ini)
./bin/build-all.sh
- See the newly built bits in release/archive/firmware-1.2.49.XXX.zip (where XXX is the git commit)