mirror of
https://github.com/meshtastic/meshtastic.git
synced 2024-12-31 16:37:32 -08:00
Thanks to aspell and languagetool. Hand picked from these, there are too
many strange things in the English language to be perfectly syntactical.
77 lines
3.1 KiB
Markdown
77 lines
3.1 KiB
Markdown
---
|
|
id: build-env
|
|
title: Creating a build/development environment
|
|
sidebar_label: Building Meshtastic
|
|
---
|
|
|
|
This project uses the simple PlatformIO build system. PlatformIO is an extension to Microsoft VSCode.
|
|
|
|
## GUI Installation
|
|
|
|
1. Install [Python](https://www.python.org/downloads/).
|
|
2. Install [Git](https://git-scm.com/downloads) or [GitHub Desktop](https://desktop.github.com/)
|
|
3. Install [Microsoft Visual Studio Code](https://code.visualstudio.com/)
|
|
4. Install [PlatformIO](https://platformio.org/platformio-ide).
|
|
5. Click the PlatformIO icon on the side bar.
|
|

|
|
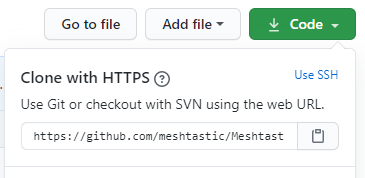
6. Under `Quick Access, Miscellaneous, Clone Git Project` enter the URL of the Meshtastic repo found [here](https://github.com/meshtastic/Meshtastic-device).
|
|

|
|
7. Select a file location to save the repo.
|
|
8. Once loaded, open the `platformio.ini` file.
|
|
9. At the line `default_envs` you can change it to the board type you are building for ie. `tlora-v2, tlora-v1, tlora-v2-1-1.6, tbeam, heltec, tbeam0.7` (boards are listed further down in the file).
|
|
10. The hardware can be configured for different countries by adding a definition to the `configuration.h` file. `#define HW_VERSION_US` or `HW_VERSION_EU433, HW_VERSION_EU865, HW_VERSION_CN, HW_VERSION_JP`. Other country settings can be found in `MeshRadio.h`. The default is `HW_VERSION_US`.
|
|
11. Click the PlatformIO icon on the side bar. Under `Project Tasks` you can now build or upload.
|
|
|
|
:::note
|
|
To get a clean build you may have to delete the auto-generated file `./.vscode/c_cpp_properties.json`, close and re-open Visual Studio and WAIT until the file is auto-generated before compiling again.
|
|
:::
|
|
|
|
## Manual Installation on Linux
|
|
1. On a Linux distro (like Ubuntu), ensure you have pre-requisites installed:
|
|
|
|
```
|
|
sudo apt-get update
|
|
sudo apt-get install python3 g++ zip
|
|
```
|
|
|
|
2. Install PlatformIO (which is usually via wget/curl command).
|
|
|
|
```
|
|
wget https://raw.githubusercontent.com/platformio/platformio-core-installer/master/get-platformio.py -O get-platformio.py
|
|
chmod +x get-platformio.py
|
|
python3 get-platformio.py
|
|
```
|
|
|
|
3. Clone the repo https://github.com/meshtastic/Meshtastic-device
|
|
|
|
4. Change into the Meshtastic-device and then download submodules
|
|
|
|
```
|
|
cd Meshtastic-device
|
|
git submodule update --init --recursive
|
|
```
|
|
|
|
Note: If you get an error like this:
|
|
|
|
```
|
|
Compiling .pio/build/rak4631_5005/src/plugins/PositionPlugin.cpp.o
|
|
src/nrf52/NRF52CryptoEngine.cpp:3:10: fatal error: ocrypto_aes_ctr.h: No such file or directory
|
|
```
|
|
|
|
then you need to run that submodule command from the main Meshtastic-device directory.
|
|
|
|
|
|
5. Activate the Platformio python virtual environment
|
|
|
|
```
|
|
source ~/.platformio/penv/bin/activate
|
|
```
|
|
|
|
6. Build everything (optionally just build what you really need by editing platformio.ini)
|
|
|
|
```
|
|
./bin/build-all.sh
|
|
```
|
|
|
|
7. See the newly built bits in release/archive/firmware-1.2.49.XXX.zip (where XXX is the git commit)
|